Protocol Builder Orientation
A map of how protocols are organized, so you know where to click.
A protocol is the template for one exam type (e.g. Thyroid Ultrasound). Four levels:
| Protocol | The whole template. Owns report format, bracket mode, and the impression toggle. |
| Structure | An organ or region (Right Kidney). One section in the form and draft. |
| Finding | One observation (Cysts). Has a field type and report text. |
| Sub-field | Extra detail captured when the finding is abnormal (a Size under Cysts). |
Each finding has two report-text slots: Report text when a value is present (the default) and Report text when normal (used when the value is normal). Both accept placeholders. Whether a value counts as abnormal is decided separately (Normal Options, Normal Range, or Advanced Rules). Numeric findings use one measurement sentence; the range controls highlighting.
Below the structures sit Reference Images (diagrams shown during the exam) and Guideline References (text appended to the draft when a trigger finding is abnormal).
Open Protocols in the top bar and click a protocol. The settings row at the top controls the whole protocol. Each dropdown describes its selected option right below it.
| Name / Description | How the protocol shows up when starting an exam. |
| Report format | One block (default), one finding per line, or hybrid. |
| Bracket mode | Optional square brackets around findings for dictation systems. |
| Group abnormal at end | Off by default: findings keep the exam form order. On, abnormal findings move after the normal ones. Hybrid format and clustered-normals bracketing always group. |
| Show structure headings | Print each organ name as a heading in the draft. |
| Include impression | On by default: add an IMPRESSION block for the radiologist. |
Click Save Settings after any change. The Active / Inactive toggle decides whether sonographers can pick the protocol. The same toggle appears in the Status column of the Protocols page.
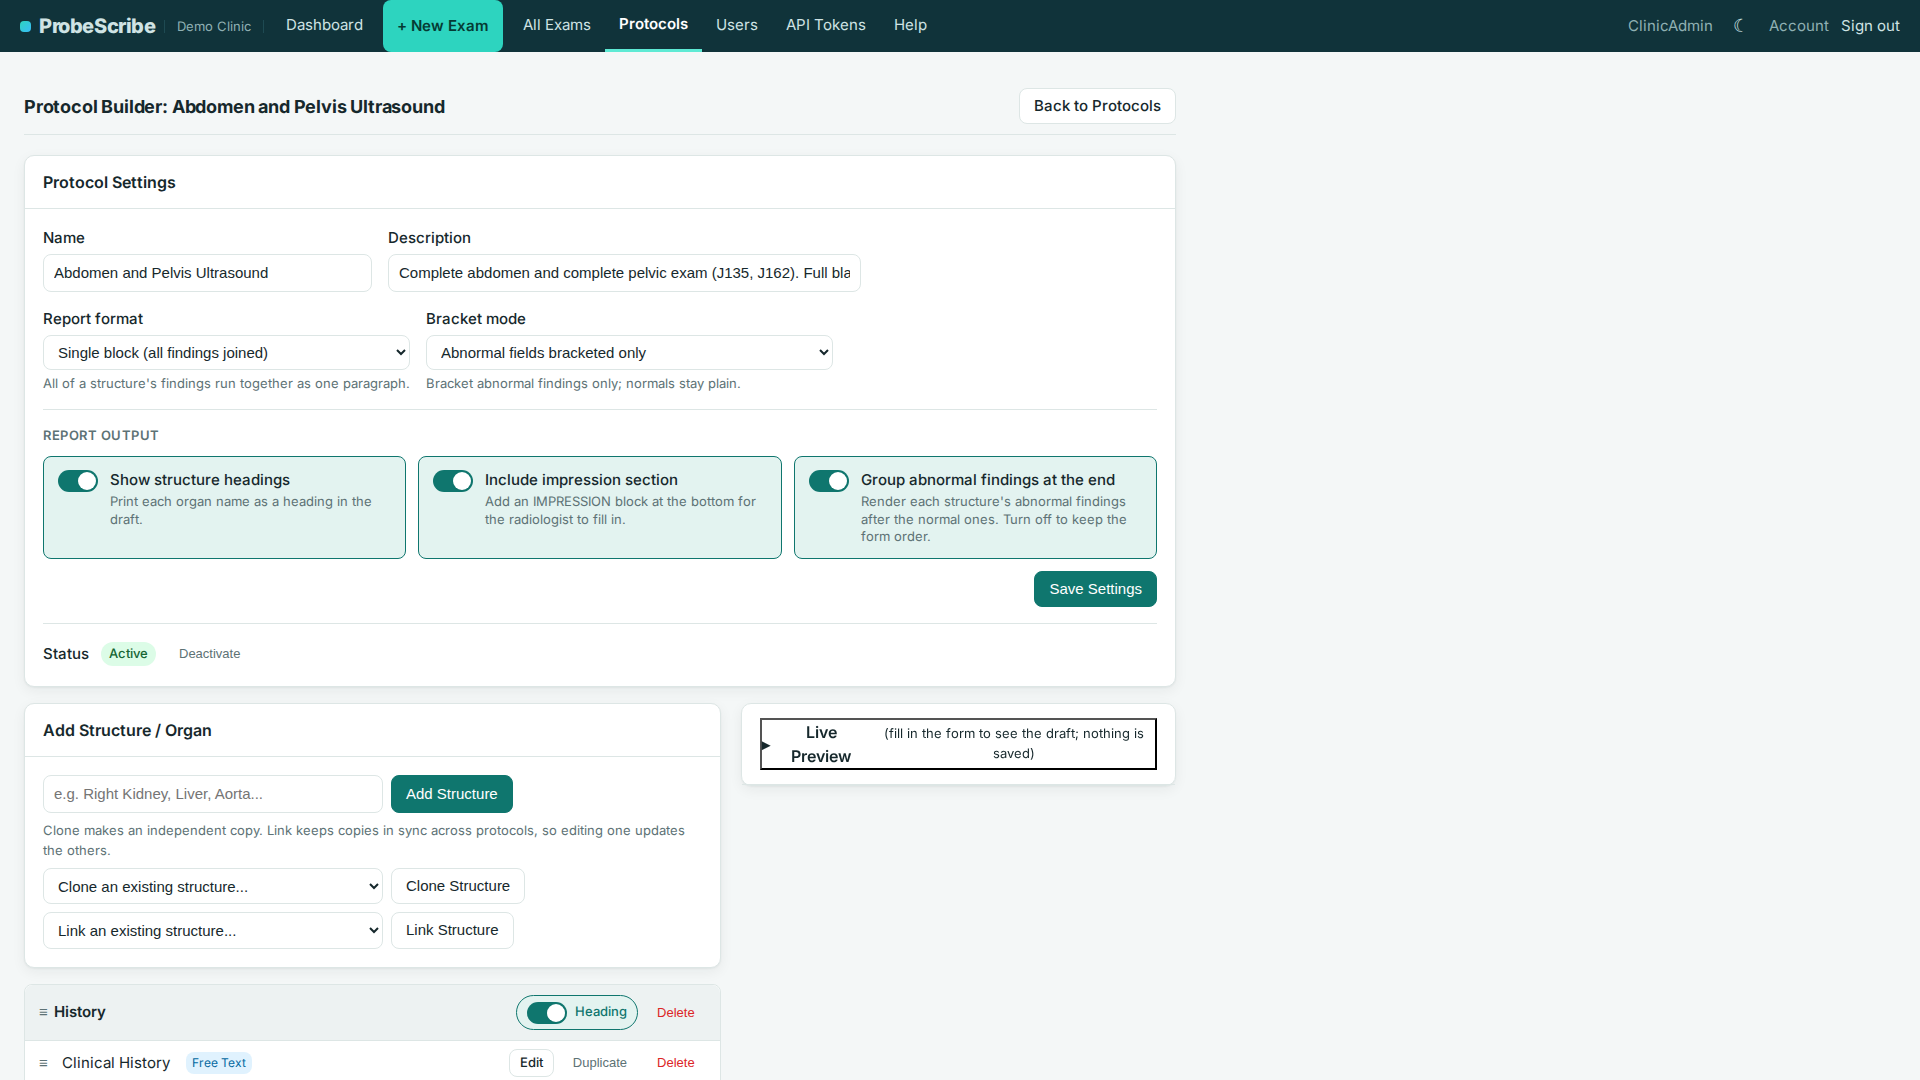
Add Structure / Organ creates a section. + Add Finding inside it creates a finding; pick a field type. Drag the handle on the left to reorder. Builder order is form and draft order.
Click Edit on a finding to open the finding editor. There you:
- Write the Report text when normal and Report text when a value is present sentences.
- Set a normal range for numeric findings.
- Add sub-fields for detail shown only when abnormal.
- Add Advanced Rules for wording that changes by value.
- Make the finding conditional on another finding's value.
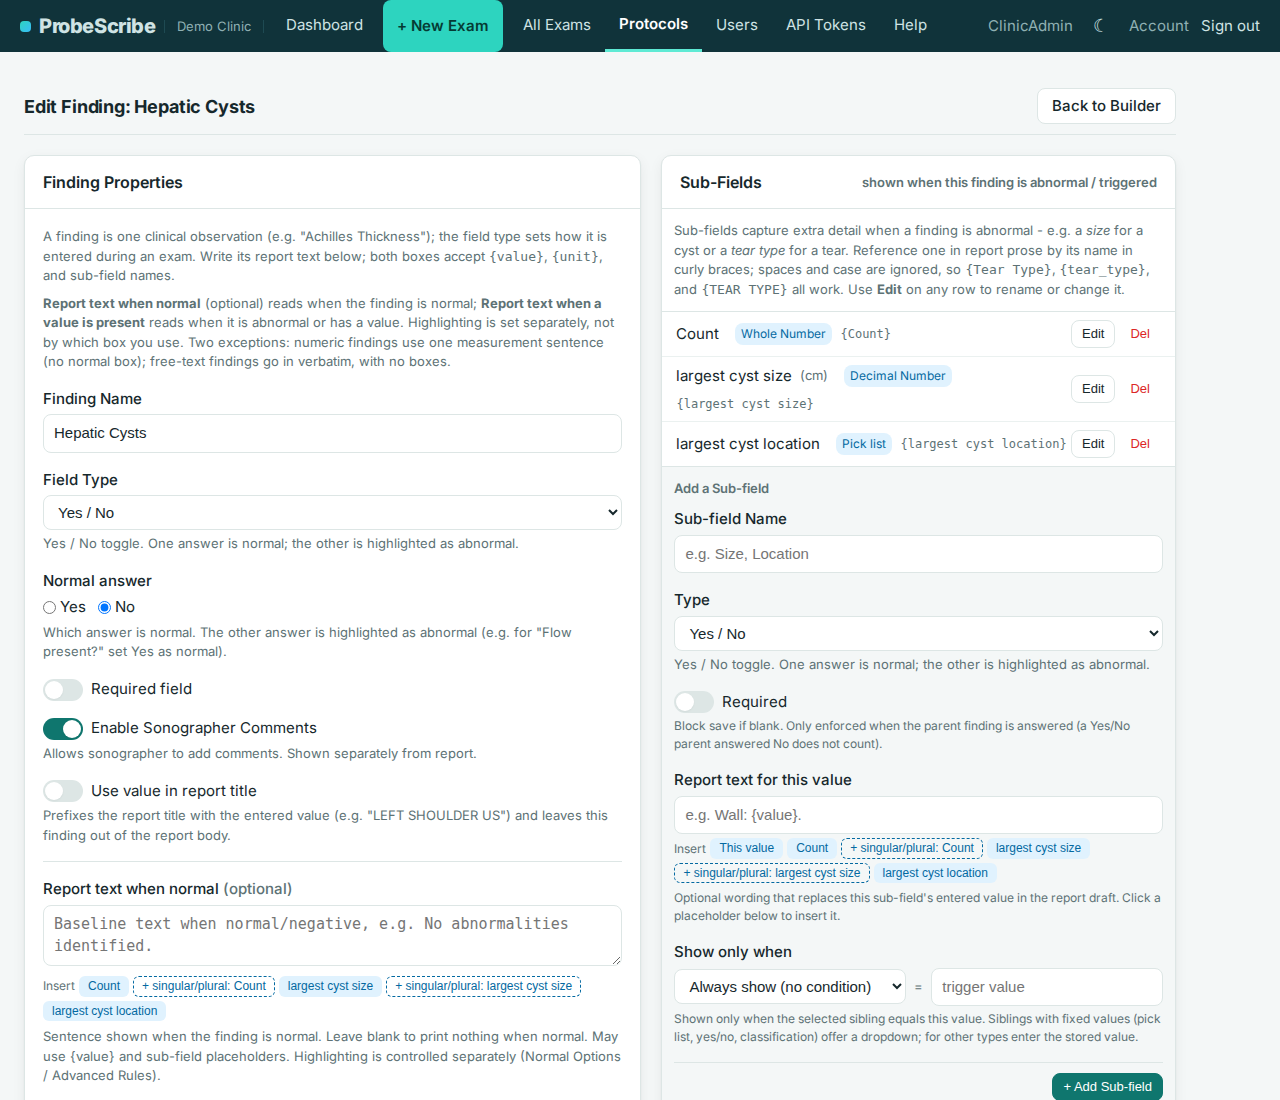
Pick the type when you create the finding. Changing it later may drop old values.
| Yes / No | A boolean toggle. |
| Pick list | A fixed set of choices. Each option can carry an optional hint (the ? toggle in the choices editor), e.g. a grading criterion. Hints appear under the option on the exam form and never in the report draft. |
| Decimal Number | A measurement with optional unit and normal range. |
| Whole Number | Integer counts. |
| Free Text | Short prose, printed exactly as typed. No templates, rules, or sub-fields. |
| Measurement | One to three linear axes, optional area or volume. |
| Multi-instance | Repeats the sub-field group per item (several cysts, masses). |
| Calculated Classification | Derives a category (TI-RADS, O-RADS) from sibling answers. Read-only on the form. |
| Gestational Age | Weeks + days, transcribed by the sonographer, never calculated. Rules compare in decimal weeks. |
| Date | Clinical dates only (due date, prior study). Never a patient identifier. |
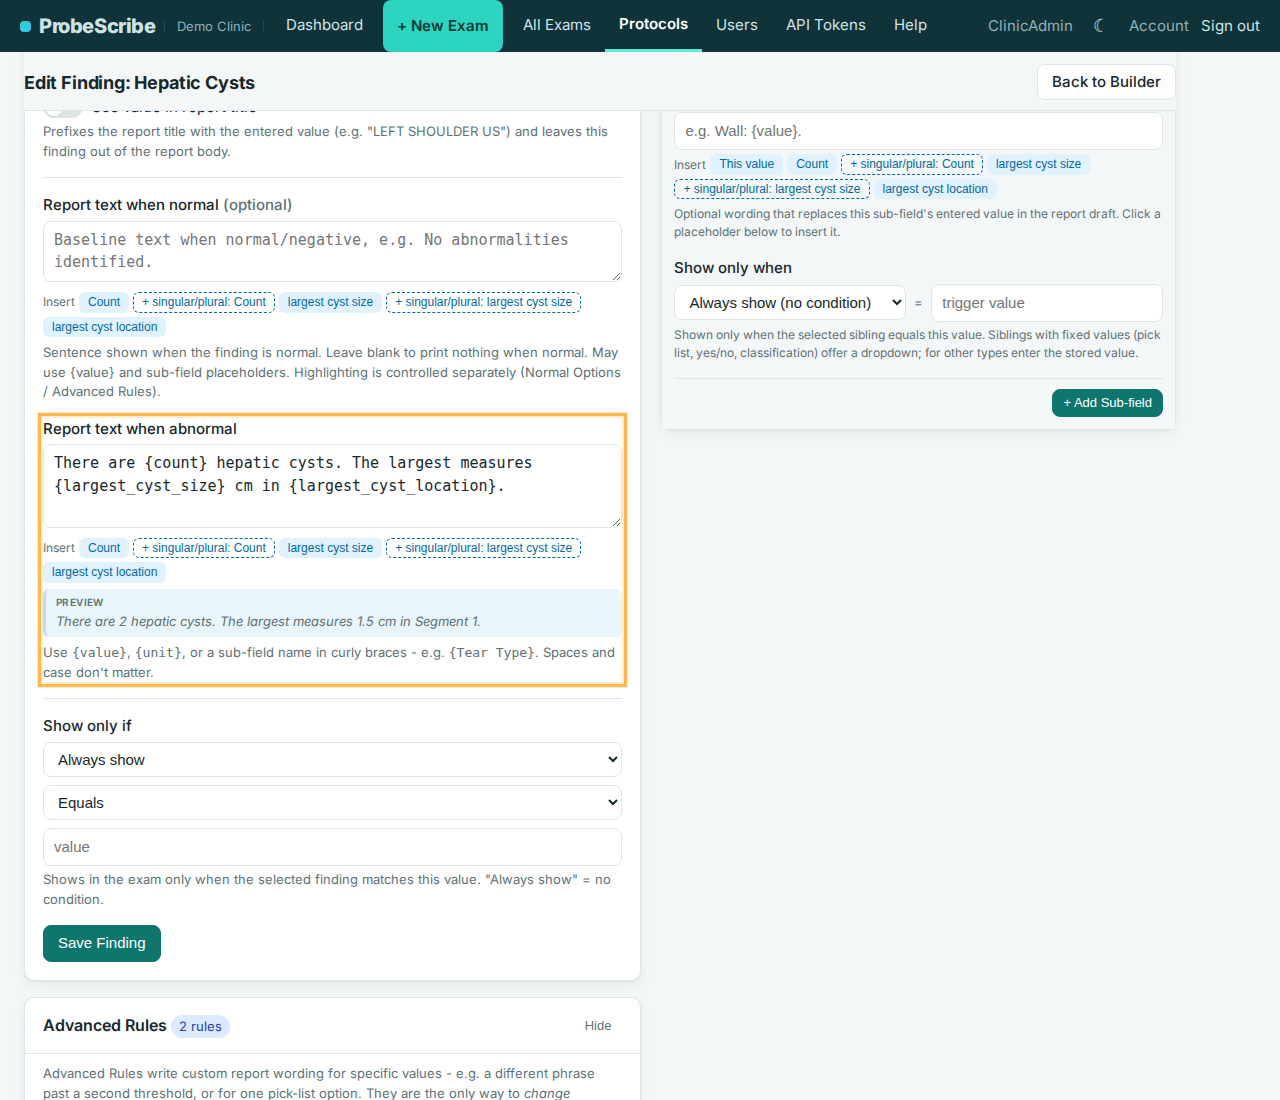
Placeholders go in curly braces. The Insert buttons under each box add them
at your cursor, and a live preview shows the filled sentence.
Capitalization and underscores vs spaces don't matter:
{Tear Type} and {tear_type} match the same sub-field.
Names may not contain { } | or :.
Slashes, parentheses, and apostrophes are fine (S/D Ratio, Morton's Neuroma).
Pick lists use one template with {value} (e.g. The waveform is {value}.).
Normal Options read the same way, just without highlighting.
Report text when normal offers three modes for a normal pick: reuse the value
text (the default), custom text, or print nothing (the pick is left out of the report
draft entirely). For yes/no findings, leave the normal box blank to print nothing.
{value} | The entered value. |
{unit} | The finding's unit (cm, mm, mL). |
{Sub-field Name} | Any sub-field's value. |
{volume}, {area} | A Measurement finding's calculated value with unit. |
{Size::volume} | A Measurement sub-field's calculation. |
{count|cyst:cysts} | Singular when count is 1, plural otherwise. The dashed singular/plural button inserts it. |
The liver measures {value} cm at the midclavicular line.

Hepatic cysts are identified, numbering {count}. The largest cyst measures
{largest_cyst_size} cm in segment {largest_cyst_segment}.
A mistyped placeholder renders a warning marker
({unrecognized placeholder name "lragest_cyst"}) so you catch it immediately.
Use a rule when the sentence itself should change at certain values. Each rule is a comparison plus a sentence. Rules run top to bottom; first match wins. No match falls back to the default slot. Highlighting still comes from the normal range. Free Text, Date, Measurement, and Multi-instance findings render values directly, so this card is hidden for them.
| Test value of | The finding's own value, or one of its sub-fields. |
| Comparisons | Numbers: greater/less than (or equal), equals. Pick-lists and yes/no: equals, does not equal, any value. |
| Mark as abnormal | Highlight the matched sentence. Leave off for benign rephrasings. |
| Highlight-only | Keep the default sentence; only control highlighting. |
| Ordering | Drag to reorder. Most specific rule first. |
Example on Liver Length:
Comparison: greater than
Value:      16.0
Report:     The liver is enlarged, measuring {value} cm
            at the midclavicular line.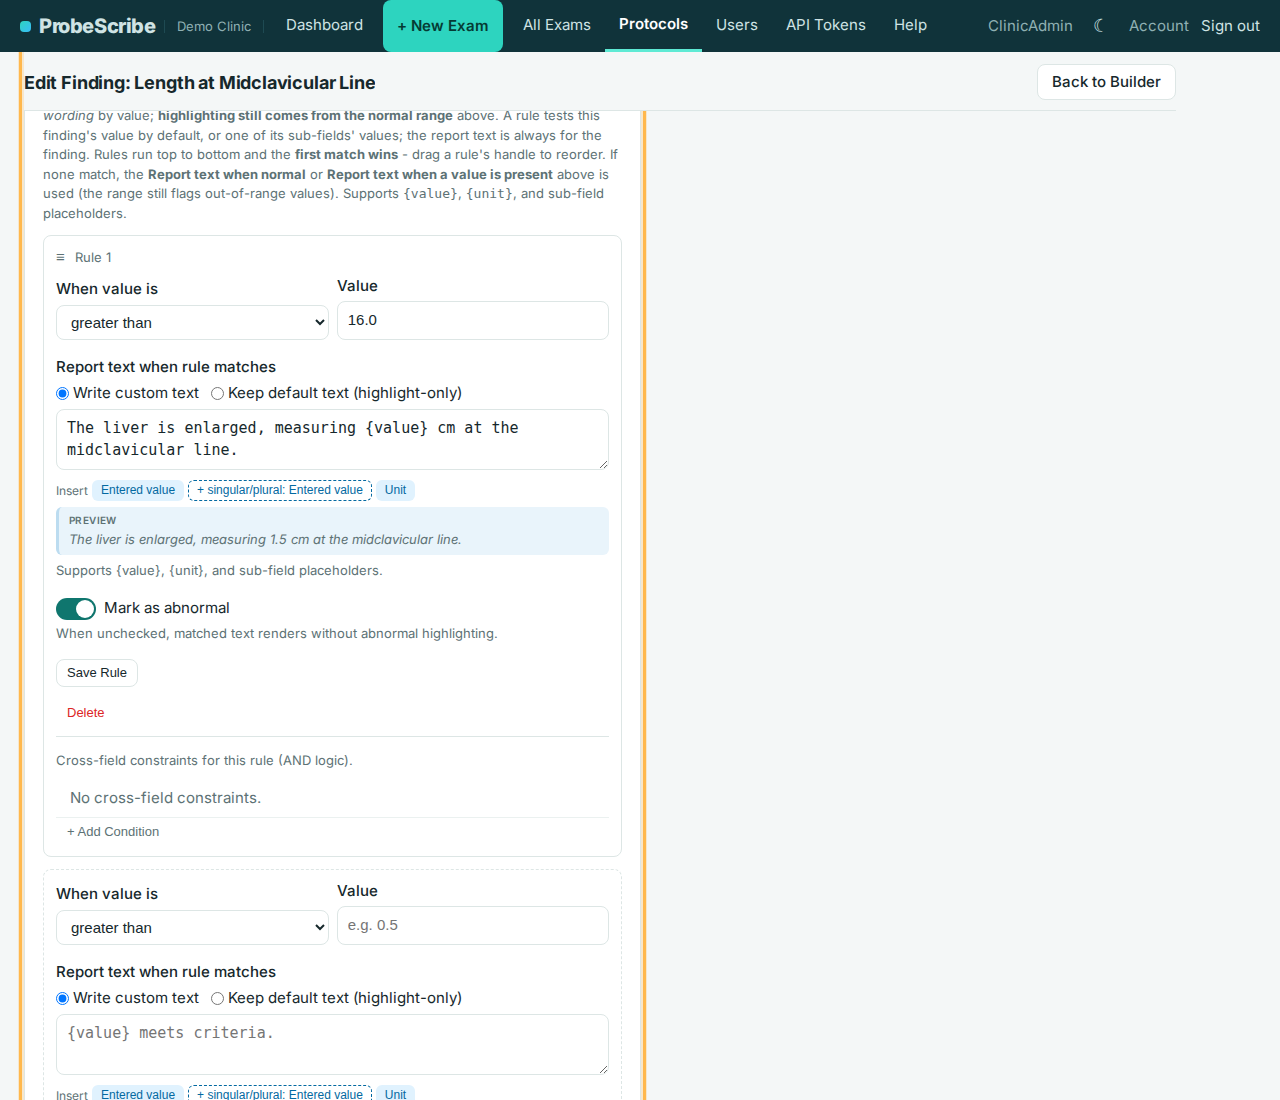
A rule can carry cross-conditions, added inline with + Add Condition. The rule fires only when all of them hold. They can reference any finding in the protocol.
Example: a rule on Endometrial Thickness reads "abnormally thickened" only when Menopausal Status equals "Postmenopausal".
A cross-condition can also test a sub-field, including one on the rule's own finding. Sub-fields of multi-instance findings and dimension sub-fields can't be tested.
In the sub-field editor, Show only when limits a sub-field to a specific value of a sibling. Example: Solid Component appears only when Cyst or Solid is "Cystic with solid component". While hidden, it never receives a value.
A Measurement finding captures one to three linear dimensions. Set the Unit (cm or mm), the Axis labels, and the Calculation (none, area, or volume). Both calculations use the prolate-ellipsoid formula: area = (π/4) × d1 × d2; volume = (π/6) × d1 × d2 × d3. The calculated unit is derived (cm → mL or cm²).
{value} | Every entered axis with the unit, e.g. 3.5 x 2.1 x 4.0 cm. |
{unit} | The measurement unit on its own. |
{volume}, {area} | The calculated value. A sub-field's is {Size::volume}. |
Individual axes are not placeholders; {value} always prints all entered axes.
Use Multi-instance when a structure can have several of one thing (cysts, masses, lymph nodes). The sub-fields become the per-item form; the sonographer hits + Add for another.
- Report text when a value is present renders once per instance. Numbered prefixes are added when there is more than one.
- Leading prose is one summary sentence above the list when there are two or more instances.
{value}and{unit}are not available at the top level. Reference sub-fields by name ({Size::volume}).
A Calculated Classification derives a category from its sibling fields. Configure it in the finding editor's Classification panel:
| Method | Points total sums points per option; Decision table checks categories top to bottom and picks the first whose conditions are all true. Conditions combine with AND; for either/or, add another category with the same label. |
| Contributing fields | The pick-list or yes/no siblings it reads. Hidden fields never contribute. |
| Categories | One row each: label, point band or conditions, optional report text ({value}, {points}), and an Abnormal flag. |
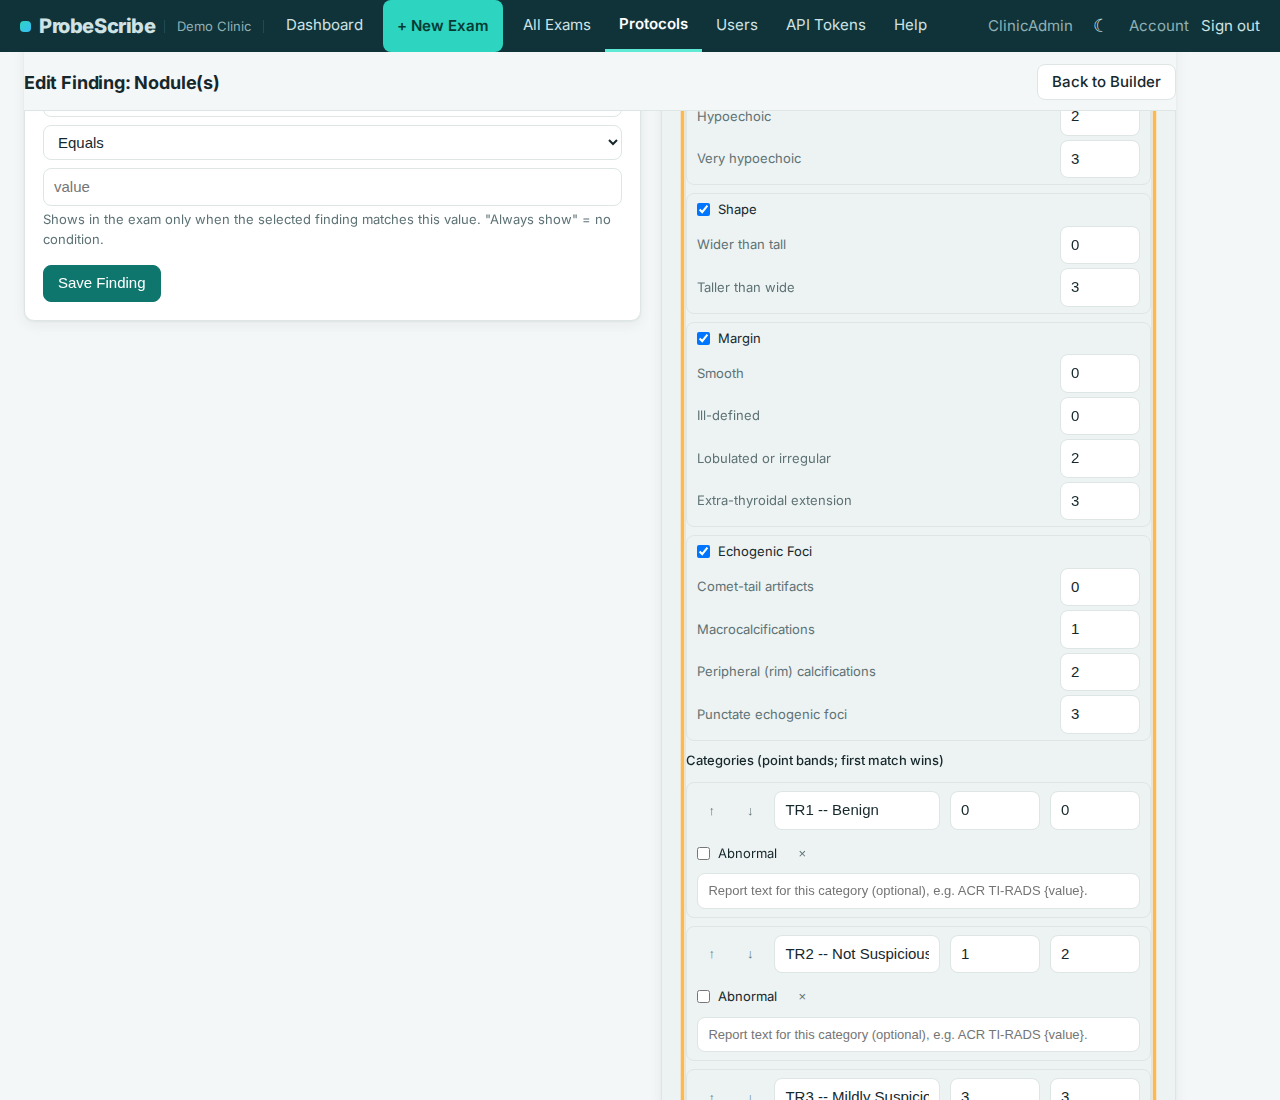
The badge on the exam form recalculates live. The category is derived on every render, never stored, so the draft, worksheet, and conditions always agree.
- Reference Images: PNGs or JPEGs shown to the sonographer during the exam. Drag to reorder; optional caption.
- Guideline References: a named text block (e.g. ACR TI-RADS criteria) appended under REFERENCES in the draft, only when its trigger finding is abnormal.